when i was looking for inspiration, i looked back on what i've made so far... i have 38 diy vids in total... out of all... i love my oversized bow top the most... though i was having a rough period, while i was making it, i gave it my all... i've hand stitched the whole top and made it as neat as i could... one of the things i've made from scratch... *proud at myself* XD can't wait to wear it again ^^
so looking at that top, gave me inspiration to do more tops... since it's spring already, and summer will be coming up soon (time flies)... i decided to do some spring/summer tees... and as i remember, some of you have requested more tee diys... so last friday, i grabbed some h&m tees from the male section... hopefully i can use these for my designs...
here are some sketches i've made... (i know they look awfully bad XD i'm bad at drawing fashion pieces...) i normally don't make any sketches, i usually just make them from what i have in mind... but since i'm very busy... and am not sure when i'm going to create them... i was afraid to forget about them... sooo... i sketched my designs... though they kinda look different from how i have them in mind, they kind of help me remember how i want to sew everything in place...
i'm not sure yet if i am going to make them all... but... you can expect some spring/summer diys soon ^^
have a great night everyone...
ps. i love my 2 fishes at the side, tehee... they are too cute... >>
Showing posts with label diy. Show all posts
2011/04/19
2011/02/09
one for myself ^^
i made this furry hood... if you've watched my diy scoody vid, you might know how... instead of the scarf part, i attached a braided string with a furry ball XD on each side...
i used furry material, that i've cut out from a furry tube scarf... and used the same fleece fabric for the lining... it's cute, nice and warm...
i'm gonna look for other furry materials and might remake this... tutorial wanted anyone?
i used furry material, that i've cut out from a furry tube scarf... and used the same fleece fabric for the lining... it's cute, nice and warm...
i'm gonna look for other furry materials and might remake this... tutorial wanted anyone?
posted by
Jen Lam
at
2/09/2011 09:29:00 PM
2011/01/05
happy 2011!!
it's my first post in 2011... wish you all a great year!!
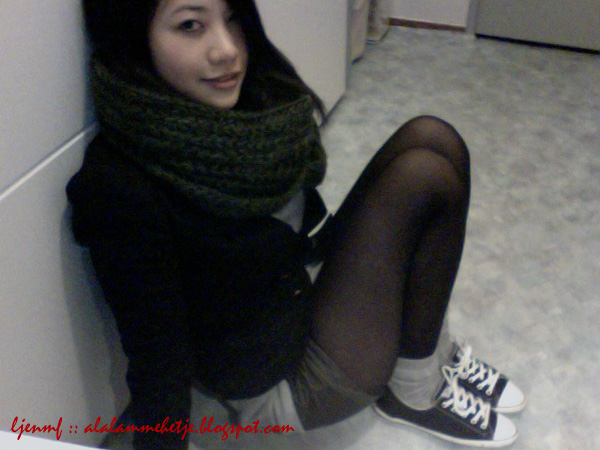
all the snow is gone now... and i'm so happy ^^ now i can wear my all stars again... and hereby... i want to show you my ootd of yesterday...
i was wearing a grey sweater (yesstyle.com)... because the sweater doesn't have much shape, i wore it off the shoulder... just adds a feminine touch to the whole outfit... and under it i just wore a white tanktop (h&m)... to match the white in my all stars and to keep me warm... as bottom, i'm wearing my diy olive green shorts (new yorker)... under the shorts a pair of 40den tights (primark)... paired up with grey socks (primark)... and ofcourse my black all stars... i wore my fitted blazer (h&m) as an outer... paired it up with my huge olive green scarf (primark) and black knitted hat (only)...
i love shorts... i can wear them all year around ^^ i "diy-ed" the olive green shorts,.. just the day before 2011... it's made from a pair knee length shorts that i got on sale... i've just cutten the shorts in the length i wanted + some extra cm, for hemming... after hemming, i've just folded it up, and hand sewed the sides, so the folding would stay...
after i got the shorts done i started making rings... i made 2 ^^ since i was tired... i've really struggled with the chains... which costed me so much more time than i normally would need... :X
here are the results ^^
this one is actually the same as the one i did a tutorial on... but just in a black/gunmetal color... and the chain is longer... my bf suggested me to wear them together, and it looks quite nice...
another one i've made, is a one finger ring... 2 ways i have on wearing it...
just simply straight, loose, hanging...
and twisted...
planning on making more... i still got some chain left ^^ have you tried it out allready?
have a good night/evening/morning, whereever you are... <3
posted by
Jen Lam
at
1/05/2011 10:12:00 PM
2009/08/26
measurements of my vest
here is the video about the measurements of my black vest, which i showed in my hkhaul vid :) for everyone who requested this, or are interested... please enjoy :) have fun sewing!!
a better picture of the measurements (click to enlarge)
all measurements are in cm:

the width is 113 cm in total, left part till the oval cutout is 40cm, the width of the oval cutout is 33 and the right part is 40...
the length is 58 in total, the upper part till the oval cutout is 10, the length of the cutout is 28 and the lower part is 20...
the 10 cm part is the neck part, so it is shorter than the lower part, 20cm, which covers your lower back...
a better picture of the measurements (click to enlarge)
all measurements are in cm:
the width is 113 cm in total, left part till the oval cutout is 40cm, the width of the oval cutout is 33 and the right part is 40...
the length is 58 in total, the upper part till the oval cutout is 10, the length of the cutout is 28 and the lower part is 20...
the 10 cm part is the neck part, so it is shorter than the lower part, 20cm, which covers your lower back...
posted by
Jen Lam
at
8/26/2009 04:07:00 PM
Subscribe to:
Posts (Atom)